Run Ollama and Stable Diffusion with your Intel Arc GPU
Effortlessly deploy a Docker-based solution that uses Open WebUI as your user-friendly AI Interface, Ollama for integrating Large Language Models (LLM), and SD.Next to streamline Stable Diffusion capabilities, all while tapping into the power of Intel Arc Series GPUs on Linux systems by using Intel® Extension for PyTorch.

Services
-
Ollama
- Runs llama.cpp and Ollama with IPEX-LLM on your Linux computer with Intel Arc GPU.
- Built following the guidelines from Intel.
- Uses the official Intel ipex-llm docker image as the base container.
- Uses the latest versions of required packages, prioritizing cutting-edge features over stability.
- Exposes port
11434for connecting other tools to your Ollama service.
-
Open WebUI
- The official distribution of Open WebUI.
WEBUI_AUTHis turned off for authentication-free usage.ENABLE_OPENAI_APIandENABLE_OLLAMA_APIflags are set to off and on, respectively, allowing interactions via Ollama only.ENABLE_IMAGE_GENERATIONis set to true, allowing you to generate images from the UI.IMAGE_GENERATION_ENGINEis set to automatic1111 (SD.Next is compatible).
-
SD.Next
- Uses as the base container the official Intel® Extension for PyTorch
- Uses a customized version of the SD.Next docker file, making it compatible with the Intel Extension for Pytorch image.
Setup
Run the following commands to start your Ollama instance with Open WebUI
$ git clone https://github.com/eleiton/ollama-intel-arc.git
$ cd ollama-intel-arc
$ podman compose up
Additionally, if you want to run the SD.Next service for image generation, run this command in a different terminal:
$ podman compose -f docker-compose.sdnext.yml up
Validate
Run the following command to verify your Ollama instance is up and running
$ curl http://localhost:11434/
Ollama is running
When using Open WebUI, you should see this partial output in your console, indicating your arc gpu was detected
[ollama-intel-arc] | Found 1 SYCL devices:
[ollama-intel-arc] | |  |                   |                                       |       |Max    |        |Max  |Global |                     |
[ollama-intel-arc] | |  |                   |                                       |       |compute|Max work|sub  |mem    |                     |
[ollama-intel-arc] | |ID|        Device Type|                                   Name|Version|units  |group   |group|size   |       Driver version|
[ollama-intel-arc] | |--|-------------------|---------------------------------------|-------|-------|--------|-----|-------|---------------------|
[ollama-intel-arc] | | 0| [level_zero:gpu:0]|                     Intel Arc Graphics|  12.71|    128|    1024|   32| 62400M|         1.6.32224+14|
Usage
- Open your web browser to http://localhost:7860 to access the SD.Next web page.
- For the purposes of this demonstration, we'll use the DreamShaper model.
- Follow these steps:
- Download the
dreamshaper_8model by clicking on its image (1). - Wait for it to download (~2GB in size) and then select it in the dropbox (2).
- (Optional) If you want to stay in the SD.Next UI, feel free to explore (3).
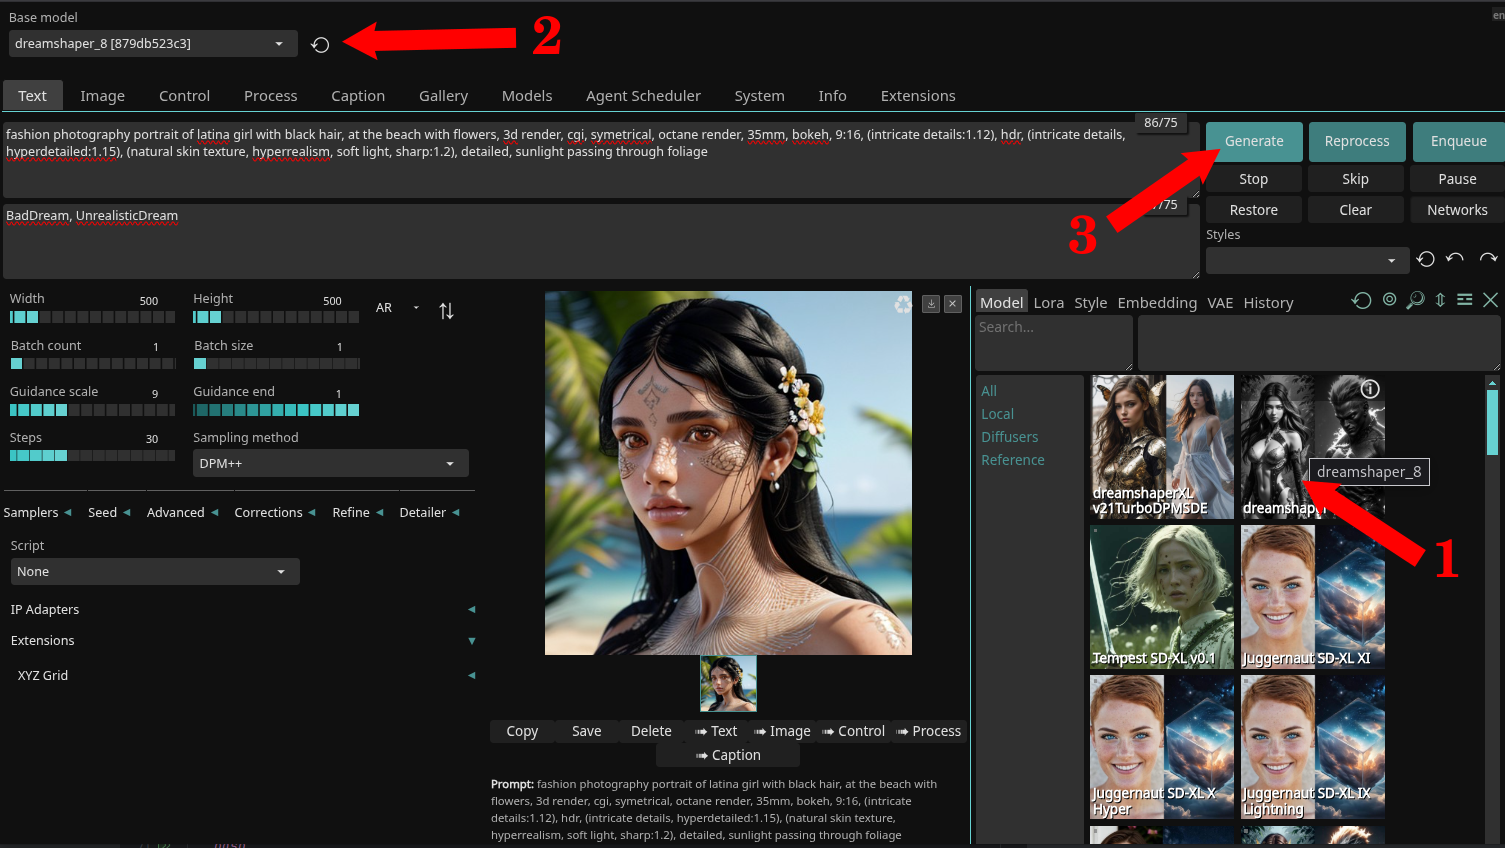
- For more information on using SD.Next, refer to the official documentation.
- Open your web browser to http://localhost:3000 to access the Open WebUI web page.
- Go to the administrator settings page.
- Go to the Image section (1)
- Make sure all settings look good, and validate them pressing the refresh button (2)
- (Optional) Save any changes if you made them. (3)
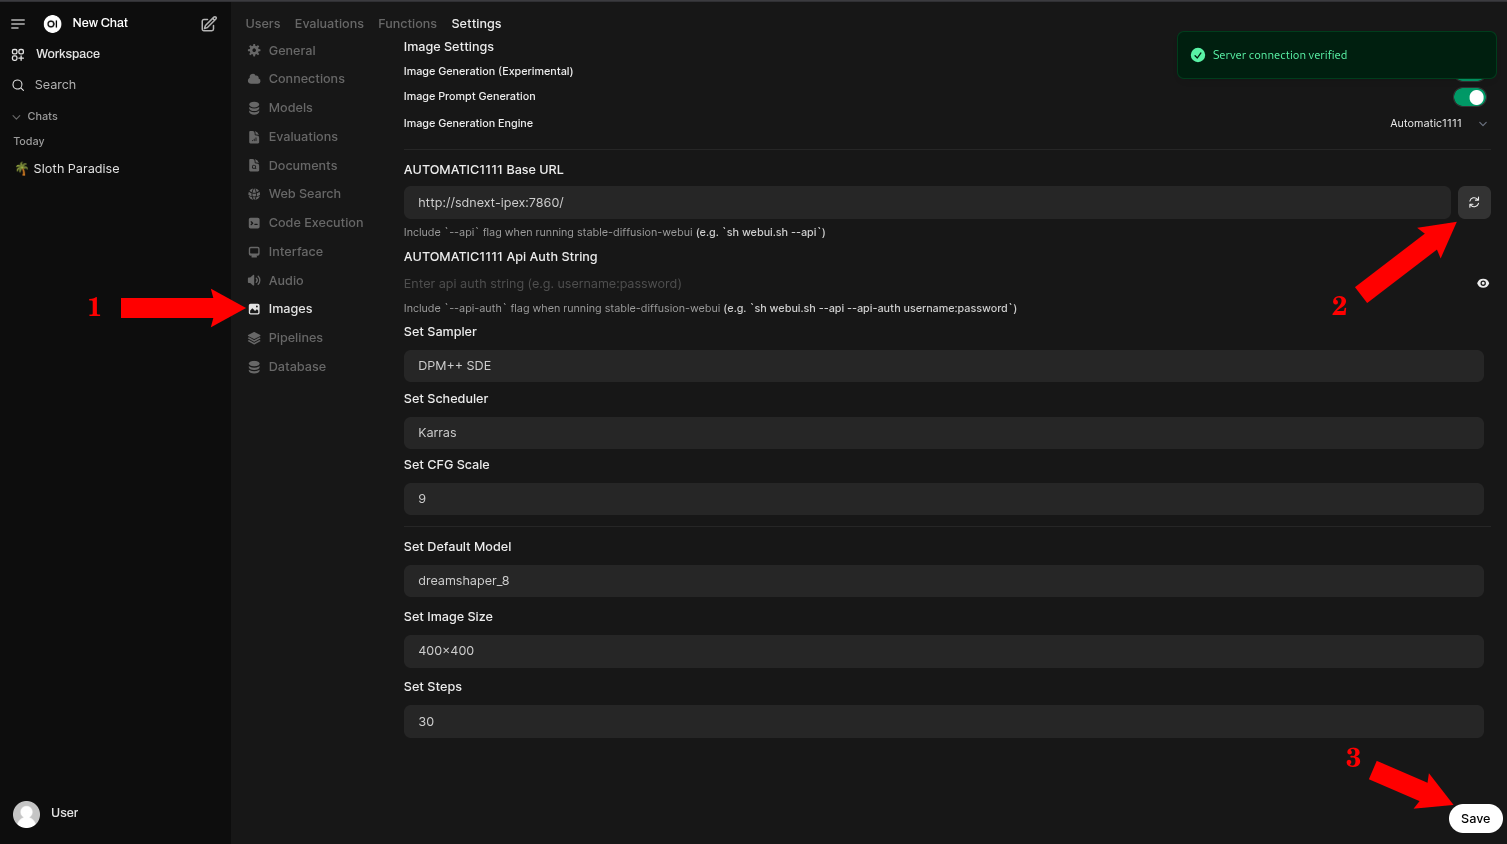
- For more information on using Open WebUI, refer to the official documentation
- That's it, go back to Open WebUI main page and start chatting. Make sure to select the
Imagebutton to indicate you want to generate Images.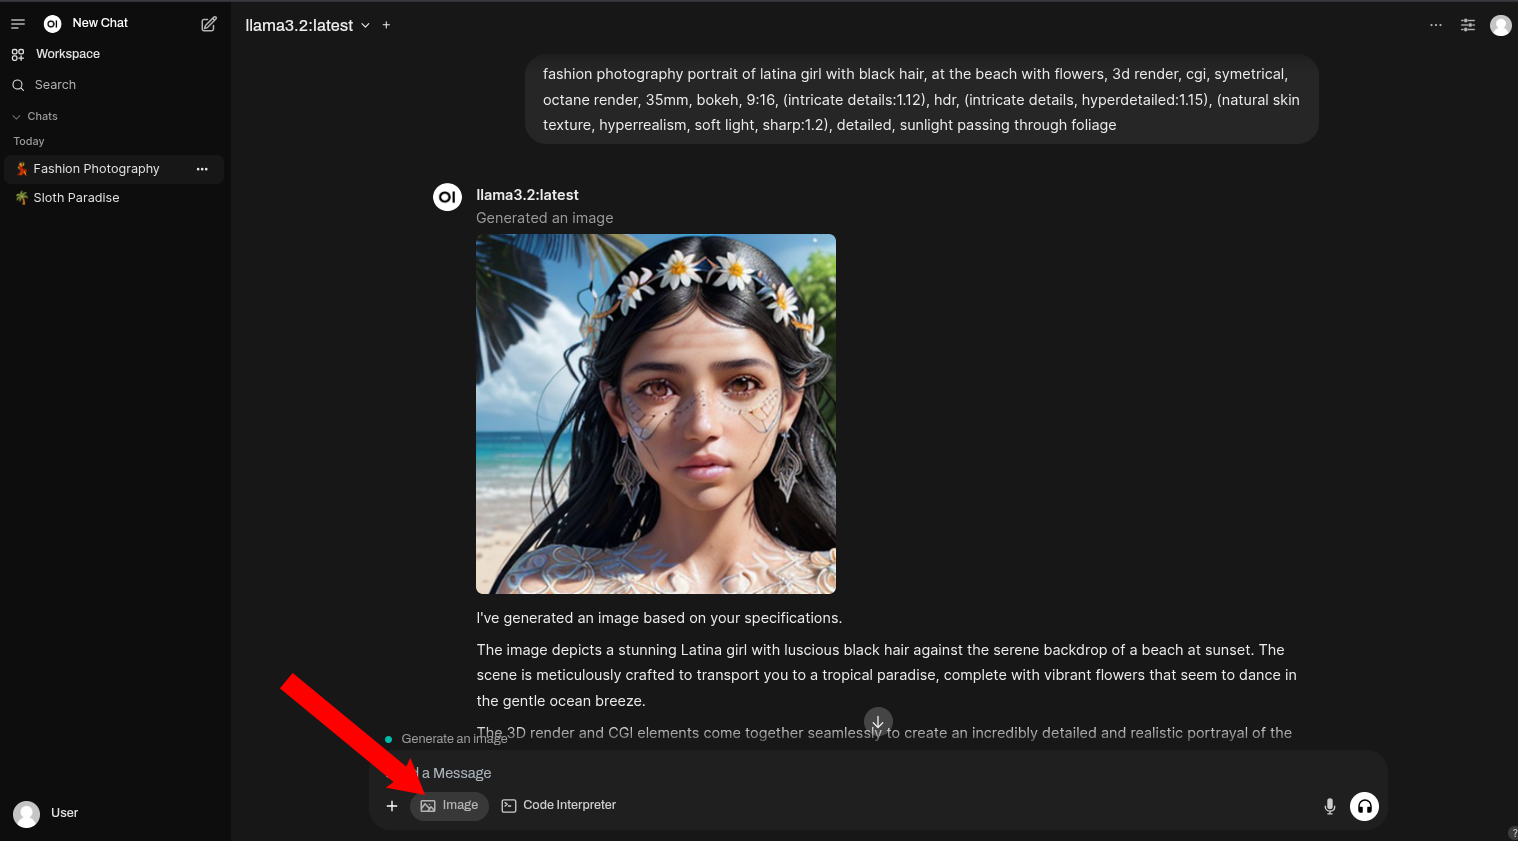


Updating the containers
If there are new updates in the ipex-llm-inference-cpp-xpu docker Image or in the Open WebUI docker Image, you may want to update your containers, to stay up to date.
Before any updates, be sure to stop your containers
$ podman compose down
Then just run a pull command to retrieve the latest images.
$ podman compose pull
After that, you can run compose up to start your services again.
$ podman compose up
Manually connecting to your Ollama container
You can connect directly to your Ollama container by running these commands:
$ podman exec -it ollama-intel-arc /bin/bash
$ /llm/ollama/ollama -v
My development environment:
- Core Ultra 7 155H
- Intel® Arc™ Graphics (Meteor Lake-P)
- Fedora 41